
Engaging children in creative activities not only entertains them but also nurtures their cognitive and motor skills. One such delightful activity is creating a DIY marble maze. Marble mazes are not only entertaining but also educational, offering children the opportunity to explore concepts like gravity, motion, and problem-solving in a hands-on manner. In this comprehensive guide brought to you by The Kids Point, we’ll delve into the world of DIY marble mazes, exploring various designs, materials, and tips to create a super fun marble maze craft for kids.
Understanding Marble Mazes
Marble mazes, also known as marble runs or marble races, are structures designed to guide a marble or ball through a series of obstacles, twists, and turns until it reaches the finish line. These mazes come in various forms, from simple cardboard setups to elaborate wooden structures with multiple levels and features.
Benefits of Marble Mazes for Kids
- Develops Problem-Solving Skills: Marble mazes challenge children to strategize and problem-solve as they figure out the best path for the marble to navigate through the maze.
- Enhances Fine Motor Skills: Manipulating marbles through the maze requires precise hand-eye coordination, aiding in the development of fine motor skills.
- Encourages Creativity: Children can unleash their creativity by designing and customizing their marble mazes using different materials and elements.
- Introduces Basic Physics Concepts: Marble mazes introduce children to fundamental physics principles such as gravity, momentum, and cause-and-effect relationships.
>> Also Read: Creative Thanksgiving Crafts for Kids: Fun Activities to Celebrate Gratitude
Materials Needed
Before diving into crafting your marble maze, gather the necessary materials. Here’s a basic list to get you started:
- Cardboard or foam board
- Craft knife or scissors
- Hot glue gun or craft glue
- Various household items for obstacles (e.g., paper tubes, popsicle sticks, plastic cups)
- Marbles or small balls
- Markers, stickers, or paint for decorating (optional)
Now, let’s explore some exciting DIY marble maze designs and how to create them:
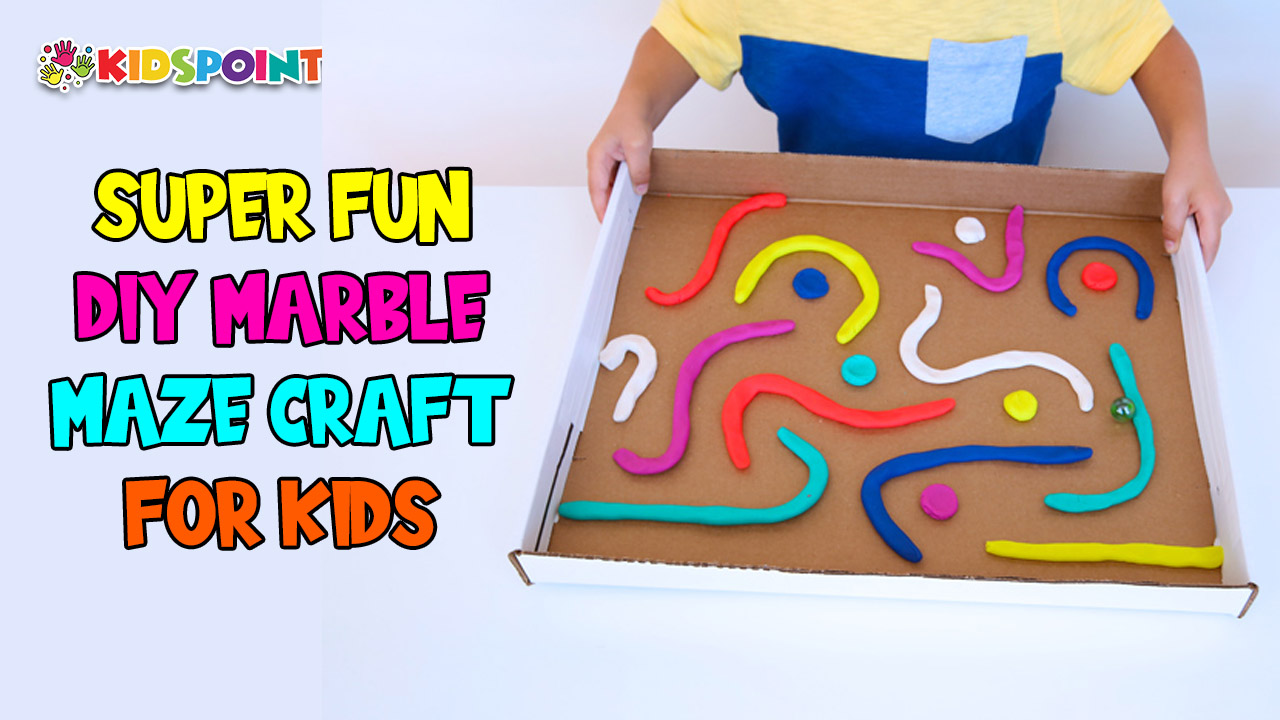
Basic Cardboard Marble Maze
- Begin by cutting a large piece of cardboard into a square or rectangular shape.
- Use a ruler and pencil to sketch your desired maze design on the cardboard. Start simple with straight paths and gradually add twists and turns to increase complexity.
- Cut out the maze pathways using a craft knife or scissors.
- Next, create obstacles and features using household items such as paper tubes, cardboard strips, or plastic cups. Attach these obstacles to the maze using hot glue or craft glue.
- Once the glue has dried, test the maze with marbles to ensure smooth navigation. Make adjustments as needed.
- Finally, decorate the maze with markers, stickers, or paint to add flair and personalization.
Foam Board Marble Maze
- Instead of cardboard, use a piece of foam board for a sturdier and more durable marble maze.
- Follow similar steps as the cardboard maze, sketching out your design and cutting pathways into the foam board.
- Foam board allows for greater customization, as you can carve out tunnels and ramps for the marbles to traverse.
- Experiment with different inclines and angles to create a dynamic and challenging maze experience.
- Decorate the foam board with colorful tape, stickers, or paint to make the maze visually appealing.
Recycled Materials Marble Maze
- Get creative with recycled materials by repurposing items from around the house to build your marble maze.
- Use cardboard boxes, toilet paper rolls, egg cartons, and other household items to construct the maze structure and obstacles.
- Cut, fold, and assemble the recycled materials to form pathways, tunnels, and barriers.
- Incorporate movable elements such as levers, doors, and ramps to add interactive elements to the maze.
- Encourage children to brainstorm and experiment with different configurations to optimize marble navigation.
>> Also Read: Paper Plate Clock Craft for Kids: A Fun and Educational Project
Tips for Creating a Super Fun Marble Maze Craft
- Start Simple: For younger children or beginners, start with a basic maze design with fewer obstacles and straightforward pathways. As they gain confidence, gradually increase the complexity of the maze.
- Safety First: When using sharp tools like craft knives or hot glue guns, adult supervision is essential to ensure the safety of children.
- Encourage Exploration: Allow children to explore and experiment with the maze, encouraging them to test different strategies and problem-solving techniques.
- Celebrate Success: Celebrate each successful run through the maze, acknowledging the effort and creativity put into crafting and navigating the maze.
- Embrace Trial and Error: Marble mazes are all about trial and error. Encourage children to embrace mistakes and learn from them as they refine their maze designs and navigation skills.
- Promote Collaboration: Marble mazes can be a collaborative activity, with children working together to design, build, and navigate the maze. Encourage teamwork and communication throughout the process.
Creating a DIY marble maze is not only a fun and engaging activity for kids but also an excellent way to promote learning and development. Whether using cardboard, foam board, or recycled materials, the possibilities for designing unique and exciting marble mazes are endless. By following the tips and techniques outlined in this guide, brought to you by The Kids Point, you can inspire creativity, problem-solving, and hours of entertainment for children of all ages. So gather your materials, unleash your imagination, and embark on a thrilling marble maze adventure!