
Bookmarks are essential tools for any reader, young or old, to mark their place in a book. However, traditional bookmarks can sometimes be a bit dull, especially for kids. That’s where DIY bookmark corners come in, adding a touch of creativity and fun to reading time. In this guide, we’ll explore how to create adorable penguin bookmark corners with The Kids Point that kids will love. This craft project is not only entertaining but also encourages children to engage with their books in a playful and imaginative way.
Why DIY Bookmark Corners?
Encourages Creativity: DIY bookmark corners provide an opportunity for children to express their creativity through crafting.
Personalization: Kids can customize their bookmarks to reflect their favorite characters, animals, or themes, making reading more enjoyable.
Promotes Reading: By making reading more interactive and fun, DIY bookmark corners can help instill a love for books in children from a young age.
Materials Needed
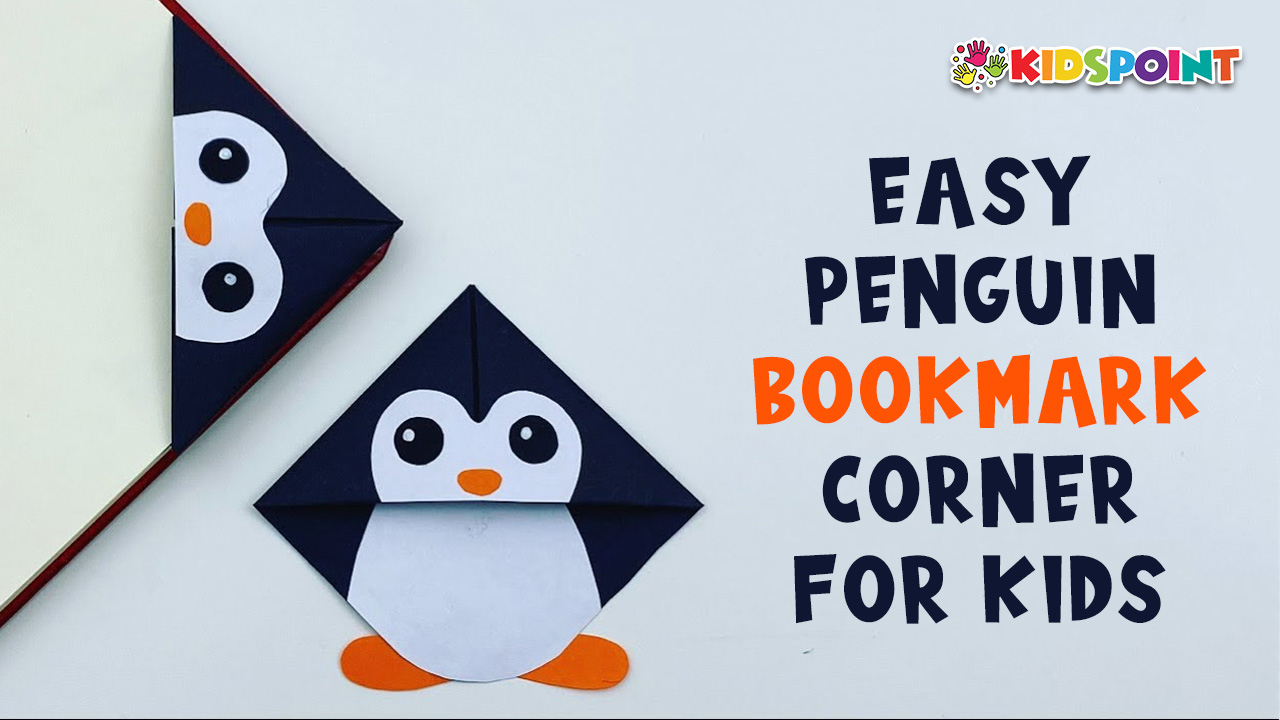
- Colored Paper: Black, white, and orange paper for the penguin’s body, belly, and beak, respectively.
- Scissors: Child-safe scissors suitable for cutting paper.
- Glue Stick: Non-toxic glue stick for adhering the paper pieces together.
- Black Marker: Fine-tip black marker for adding details to the penguin’s face.
- Optional: Googly Eyes, Stickers, or Markers for additional decoration.
>> Also Read: Super Fun DIY Marble Maze Craft for Kids
Step-by-Step Instructions
Prepare Materials: Gather all the necessary materials listed above.
Cut Square Paper: Start by cutting square pieces of black paper. The size can vary depending on the desired bookmark size, but a 3×3 inch square works well.
Fold the Paper: Fold the square paper diagonally to form a triangle, then unfold it.
Create Penguin Shape: Fold the top corners of the triangle down to meet the bottom edge, forming a smaller triangle with a flat bottom.
Fold the Bottom Edge: Fold the bottom edge of the triangle up to meet the bottom point, creating a pocket.
Secure with Glue: Apply glue to the inside of the pocket and press the folded edges together to secure them in place.
Cut Belly and Beak: Cut a small white oval shape for the penguin’s belly and a small orange triangle for its beak.
Attach Belly and Beak: Glue the white oval onto the front of the penguin’s body, slightly above the folded edge. Then, glue the orange triangle onto the white belly.
Add Details: Use a black marker to draw eyes, a mouth, and any other desired facial features onto the penguin’s face.
Optional Decoration: Get creative with additional decorations such as googly eyes, stickers, or markers to personalize the penguin bookmark.
>> Also Read: Creative Thanksgiving Crafts for Kids: Fun Activities to Celebrate Gratitude
Tips for Success
- Practice Folding: Encourage children to practice folding paper to create neat and precise corners.
- Supervision: Adult supervision may be required, especially when using scissors and glue.
- Experiment with Designs: Encourage kids to experiment with different animal shapes and colors to create a variety of bookmark corners.
- Have Fun: Remind children that crafting is all about having fun and expressing themselves creatively.
Creating penguin bookmark corners with The Kids Point is a simple yet engaging craft activity that kids will enjoy. Not only does it provide a practical tool for marking their place in books, but it also encourages creativity and fosters a love for reading. By following the step-by-step instructions and experimenting with different designs, children can create their own unique bookmarks to cherish and use during their reading adventures. So gather your materials, unleash your imagination, and let the crafting begin!